Posted on Leave a comment

Wasabi and Tamari Roasted Brussels Sprouts

One of the best things about eating only seasonal produce is the way it feels when their times comes around again – you get such a lovely suprise when they greet you in store, in the season for which they belong. Mangoes and raspberries in summer, figs towards the end of summer, mushrooms in autumn, and on it goes. It’s difficult to tire of such foods when you know you’ve got limited time together; it keeps things interesting and inspiring in the kitchen.

One of the most wonderful feelings for me each winter is the arrival of brussels sprouts and if I could be honest, by the time their season closes we are probably ready to part. The brussels sprout and I hang together a LOT.

Most of us, we’ve had our battles with these little bundles of goodness haven’t we. As a kid I sat up at the kitchen table until each cold and soggy sprout was forced down my reluctant throat. If my memory serves me correctly I’m pretty certain it was the way in which they were prepared that created such instant repulsion in my mouth.

I’ve decided that it’s my job today to INSIST that the brussels sprouts haters amongst you TRY THIS RECIPE. You hear me? Try this recipe and if you still can’t stand them you are hereby relieved from any further brussels sprouts consumption.

I’ll be honest though, I’ll be suprised to hear if their beautiful flavoursome, caramely burnty bits don’t win over your heart.. I’m that confident.

Wasabi and tamari roasted brussels sprouts

Serves 4 as a side.

500 grams brussels sprouts
1 tablespoon coconut oil, melted
1 heaped teaspoon wasabi paste
2 teaspoons tamari

Preheat your oven to 200 degrees celsius and line a baking tray with baking paper.

Rinse and dry your sprouts and trim their ends, removing any spoiled leaves from the sprout at the same time. Slice in half length ways.

In a large mixing bowl combine the coconut oil, wasabi and tamari. Adding your brussels sprouts to the bowl, toss until the sprouts are very well coated.

Spread out evenly onto your tray, cut side down and place in the oven for approximately 20 minutes, or until their edges turn a rich golden brown. Don’t be worried if you get black bits like I have – burnt edges on a brussels sprout are nothing to be scoffed at! You may though like to turn your oven tray around during cooking if your oven temperature is uneven.

Remove and serve immediately. These are also gorgeous over the next couple of days in a salad.
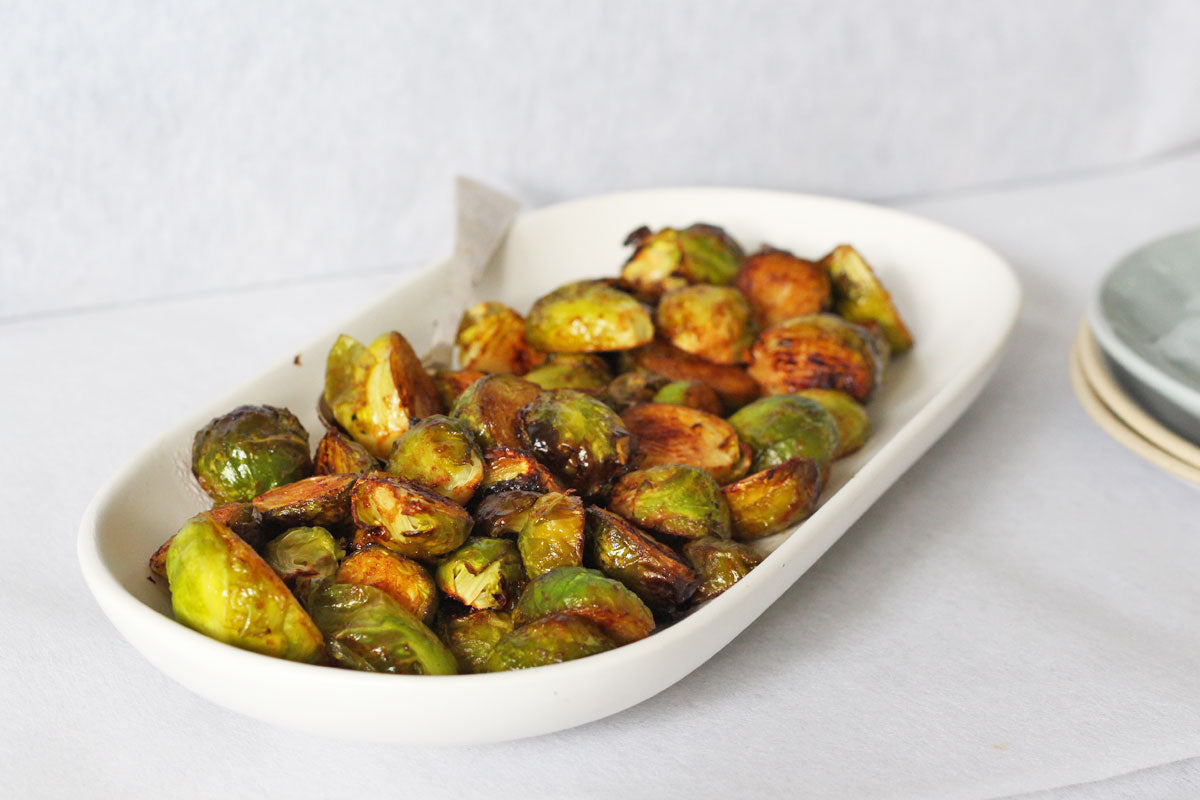
Roasted Brussels Sprouts with Wasabi and Tamari

So tell me, what is your favourite way to eat brussels sprouts? And if you’re not a lover, PLEASE let me know if I actually do manage to convert you with this recipe!

Source: theholisticingredient.com
Posted on Leave a comment

Taco Salad

A super-quick blend of reduced-fat sour cream and salsa serves double duty as salad dressing and seasoning for the meat in our updated version of Tex-Mex taco salad. Depending on the type of salsa you use, the salad will vary in heat. We keep this version light with lean turkey, but lean ground beef (about 95%-lean) would also keep the nutrition marks reasonable. Just hold the deep-fried tortilla bowl and instead serve this salad with baked tortilla chips and wedges of fresh lime.

Posted on Leave a comment

Yogurt Love: A Dozen Favorite Recipes

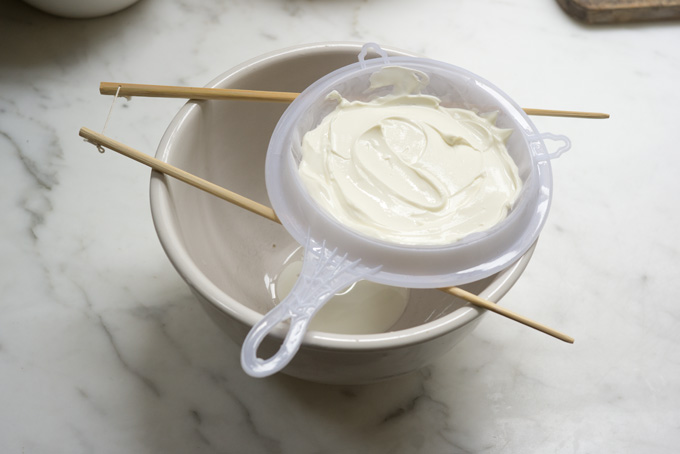
I thought I’d highlight one of the ingredients I reach for most often. Yogurt isn’t just for breakfast or a quick snack; it has limitless possibilities. If you wrap it in cheesecloth and let it drain, you’ll end up with creamy, delicious yogurt cheese (labneh), to which you can add herbs, spices, or citrus zest for a savory spread, or berries and honey if you’re after something sweeter. Unsweetened plain yogurt is the perfect base for many dips, and a favorite component in a wide range of soups and grain bowls. I’ve included a list of my favorite yogurt recipes below. Enjoy! xo – h

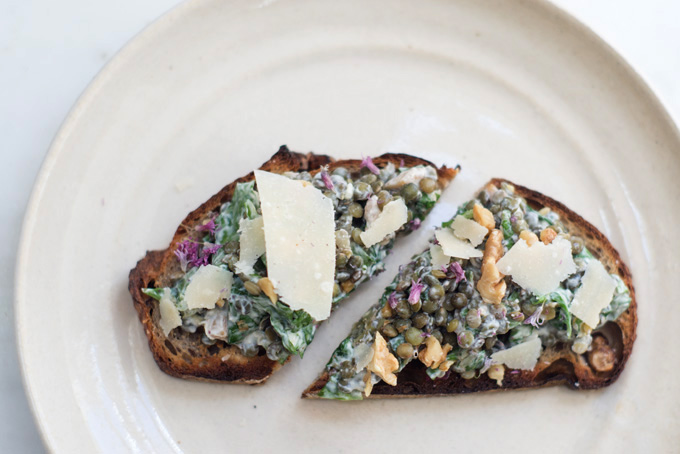
Lentils folded into Yogurt, Spinach, and Basil

Lentils folded into Yogurt, Spinach, and Basil: This recipe, from Lunch at the Shop: The Art and Practice of the Midday Meal was a big hit when I initially posted it. It’s great on many fronts, fast and easy!

Pomegranate Yogurt Bowl Recipe
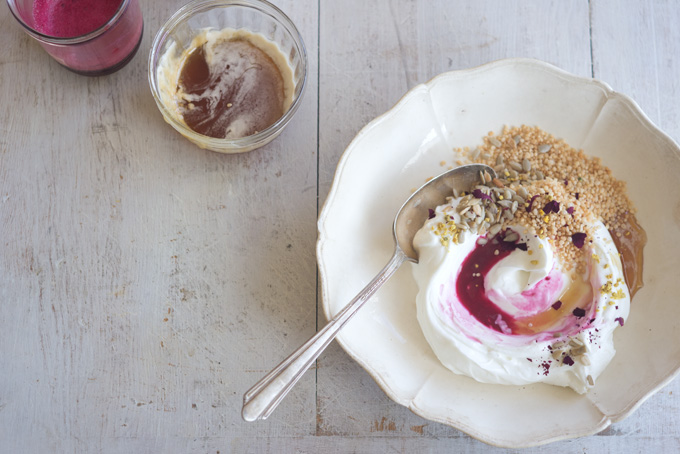
Pomegranate Yogurt Bowl: We’re on the cusp of pomegranate season, so keep this in mind. A simple breakfast bowl made with Greek yogurt, fresh pomegranate juice, puffed quinoa cereal, toasted sunflower seeds, and honey.

Labneh Recipe
Labneh Recipe:How a package from Jaipur, India inspired lots of yogurt-straining, labneh-making.

Mast-o-Khiar Yogurt Dip
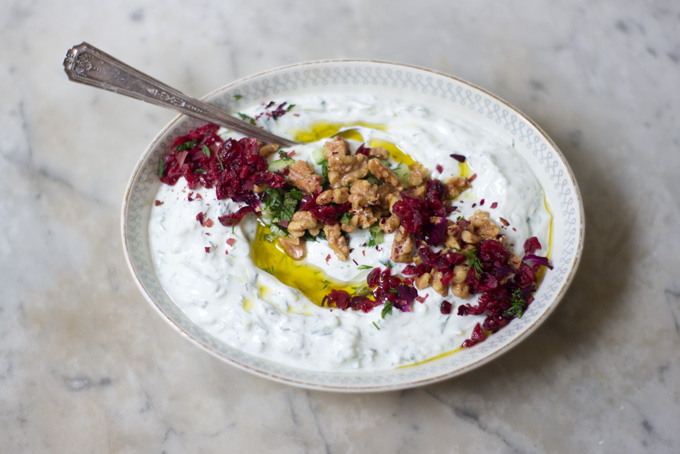
Mast-o-Khiar Yogurt Dip: The prettiest dip in my repertoire – my take on the Iranian preparation of Mast-o-Khiar (yogurt and cucumber). I use lots of fresh herbs, dried rose petals, toasted walnuts and a pop of added color and tartness from dried cranberries.

Fresh Mint Chip Frozen Yogurt
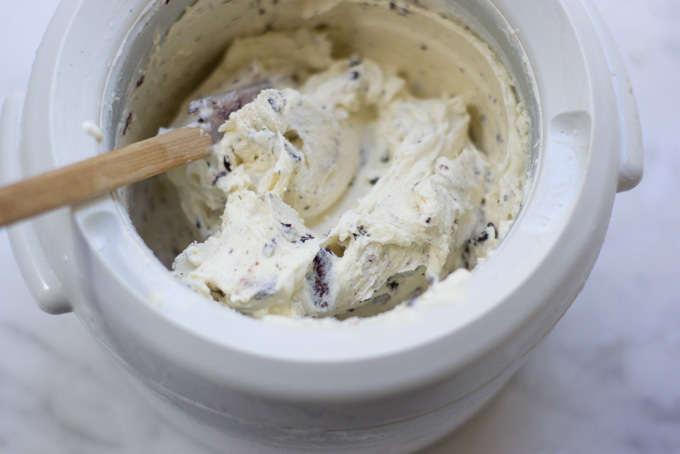
Fresh Mint Chip Frozen Yogurt: A luscious fresh mint frozen yogurt recipe from the wonderful Sprouted Kitchen cookbook.
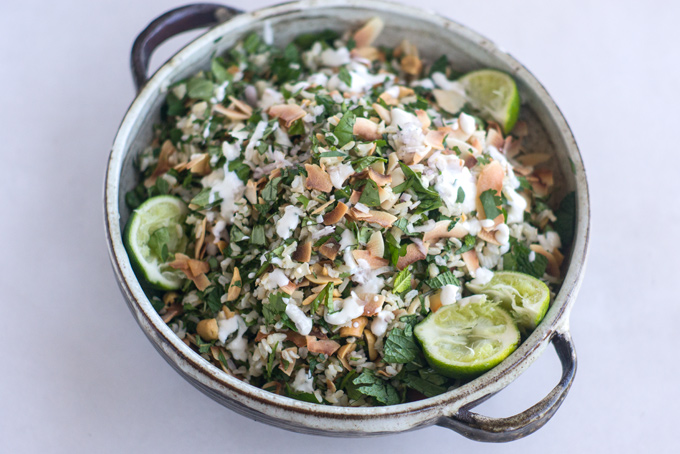
Herbal Rice Salad with Peanuts & Yogurt

Herbal Rice Salad with Peanuts & Salted Garlic Yogurt: An herb-packed rice salad recipe with peanuts, toasted coconut, a strong boost of fresh lime, and salted garlic yogurt. A recipe to keep in your back pocket.

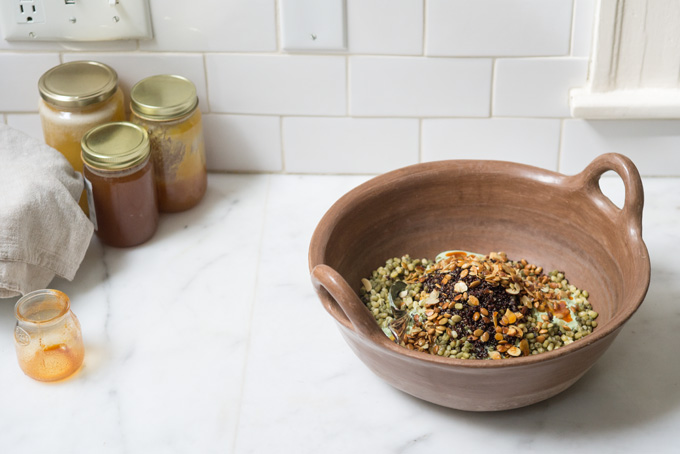
Mung Yoga Bowl
Mung Yoga Bowl: The kind of bowl that keeps you strong – herb-packed yogurt dolloped over a hearty bowl of mung beans and quinoa, finished with toasted nuts and a simple paprika oil.

Other yogurt recipe inspiration!

– Cantaloupe and Mint Yogurt Pops (Sprouted Kitchen)

– California Yogurt Bowl (Quitokeeto)

– Turkish Style Vegetables with Yogurt and Green Chile oil (Ottolenghi)

– Frying Pan Yogurt Flatbreads (Anna Jones)

– Naz’s Aash-e Reshteh for Norooz (A beautiful version of one of my favorite soups)

A few last thoughts: When it comes down to something as straightforward as purchasing or sourcing yogurt, the only thing that matters is finding a good source or brand. That slick-packaged, synthetically sweetened stuff at the supermarket isn’t what you’re after. Look for fresh organic yogurt rich in live active cultures, or if you’re more ambitious, try making your own. The live cultures in yogurt help maintain an optimum balance or microorganisms in the digestive tract. This supports healthy digestion, strengthens the immunes system, and provides a host of other benefits.


Source: 101cookbooks.com

Posted on Leave a comment

Grab – Go Chia Yogurt Parfait

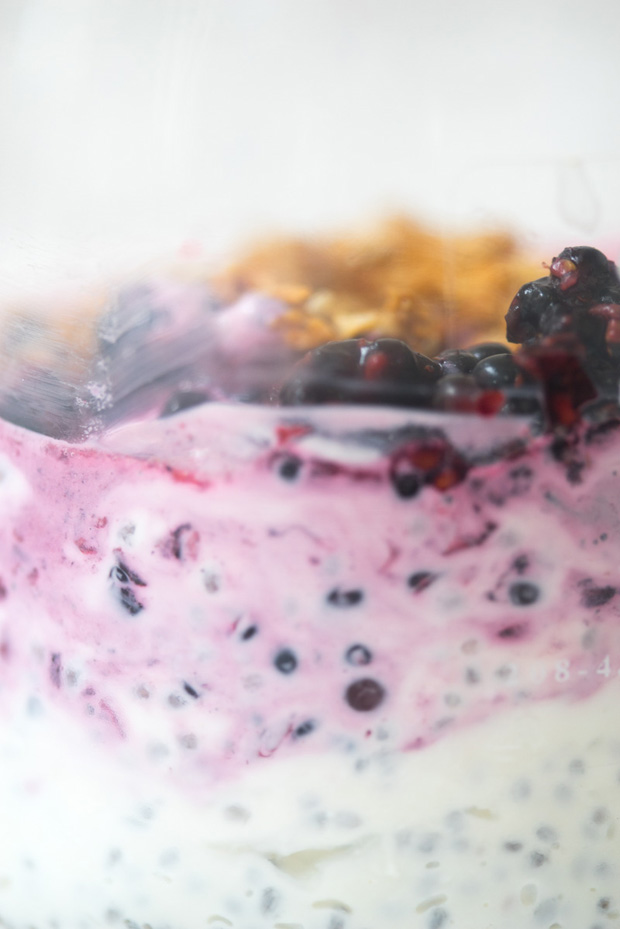
This is a favorite grab-and-go breakfast. You stir a generous spoonful of chia seeds into vanilla-spiked yogurt, and then top everything off with smashed berries, and a bit of something crunchy – toasted nuts or popped quinoa are both great options. It takes two minutes tops. The chia seeds plump overnight in the refrigerator, and you have a delicious, creamy, (seemingly) decadent parfait at the ready in the morning. It’s perfect for days when you don’t have any time to sit for a proper breakfast, and still want something A+ for the road.

Chia Yogurt Parfait
Chia Yogurt Parfait

I also posted a dairy-free / vegan chia breakfast bowl a couple of years back, it’s posted here, for those of you who’d prefer the alternative. Enjoy!

Source: 101cookbooks.com

Posted on Leave a comment

Beet Caviar Recipe

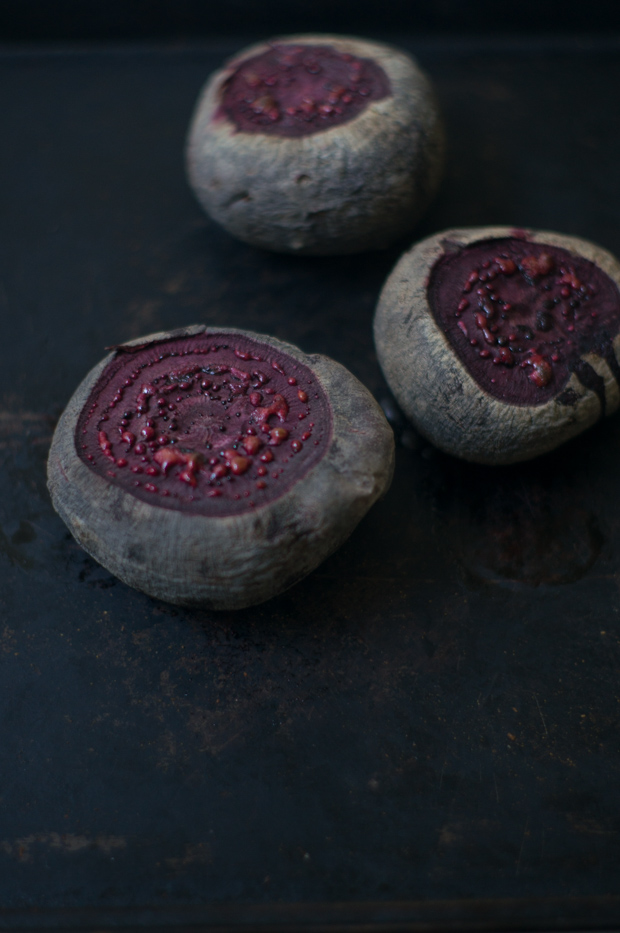
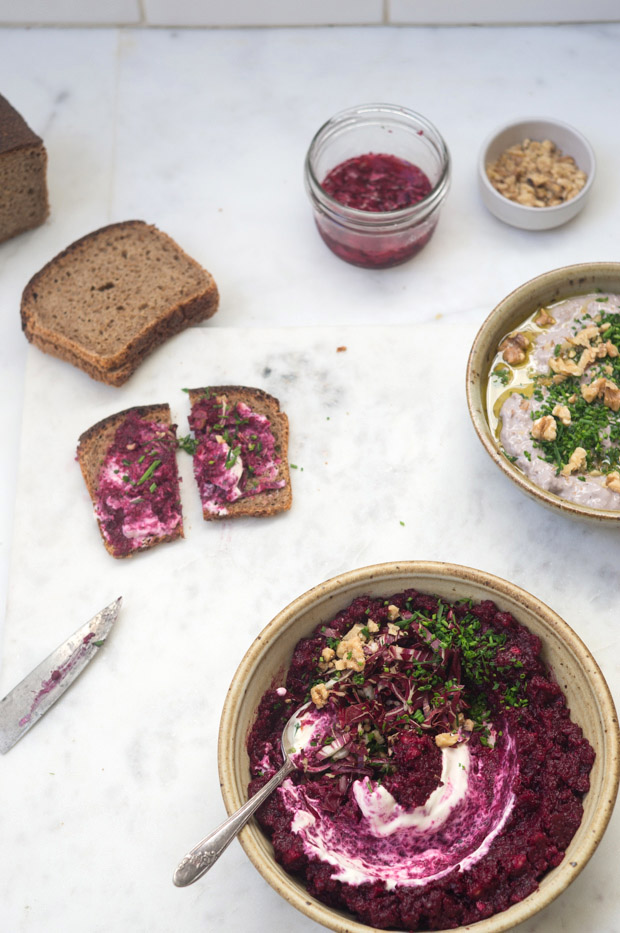
I’m lucky to be the occasional recipient of Josey Baker experimentations. The other day Josey handed me a still-hot loaf of 100% einkorn bread – substantial, fragrant, a dark brown crumb with a craggy top-crust. It smelled like a great brewery – all malt, and grain, and warmth. And it begged to be treated right. The first question to come to mind was slicing strategy…the consensus was: 1) Allow the bread to cool completely. 2) With this loaf – not too thick, not too thin. Not to digress too much, but when it comes to toast, the thickness or thinness of the slice is key. Some breads lend themselves to a thick slab – Blue Bottle Cafe (in downtown San Francisco) cooks an egg-in-the hole of Acme’s pain de mie. Perfect. There are other breads I like thinly sliced and extra-toasted – Josey’s rye comes to mind, also Anna’s Daughters’ Rye – a beautifully distinctive local bread. Once this was sorted, Josey got on with his afternoon, and I started thinking about what I’d eventually put on the bread. Silvena Rowe’s book had been in my bag for a few days, I was reading it when I was on the bus, or waiting on a coffee. So I started paging through, and settled on a beet spread I knew would be beautiful – the sweet earthiness of the roasted beets accented with toasted walnuts, chives, dates, a bit of booziness, and a swirl of creme fraiche.

Beet Caviar RecipeBeet Caviar RecipeBeet Caviar RecipeBeet Caviar Recipe

Silvena has written a couple of other books I have in my library – I suspect a good number of you might find them inspiring as well. I first purchased Purple Citrus and Sweet Perfume: Cuisine of the Eastern Mediterranean, and then Orient Express: Fast Food from the Eastern Mediterranean.

The beet caviar was a nice accompaniment to the einkorn, and I imagine it would be brilliant as a spread or dollop on just about anything – from toasted pita, to a harvest soup. A swirl would be nice in risotto, or as part of a mezze spread. Enjoy!

Beet Caviar

If you have bourbon or vodka on hand, you can use one of those in place of the cognac.

4 medium beets, washed and trimmed
5 plump dates, pitted and chopped
2 tablespoons cognac (bourbon, or vodka)
4 garlic cloves, peeled and smashed
2 tablespoons lemon juice, plus more to taste
1/2 cup chopped toasted walnuts
3/4 teaspoon fine grain sea salt
3 tablespoons creme fraiche, plain yogurt, or sour cream

lots of freshly chopped chives

Preheat the oven to 400F with a rack in the center. Puncture the beets with a fork a few times, and roast for an hour, or until the beets are completely tender when you test by cutting into the center with a knife.

In the meantime, gently heat the cognac in a small saucepan. Place the dates in a glass bowl, and, when just hot, pour the alcohol over the dates. Jostle around a bit, and soak for at least 10 minutes.

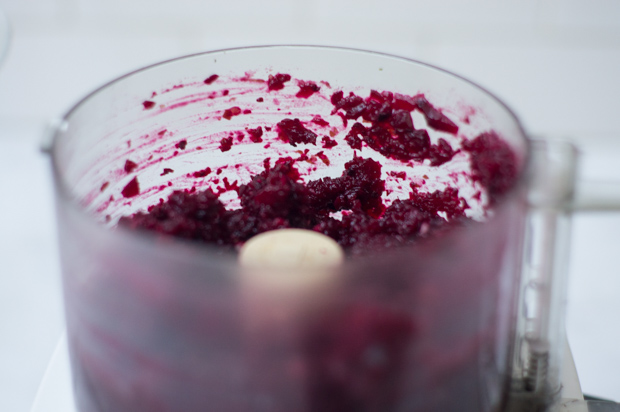
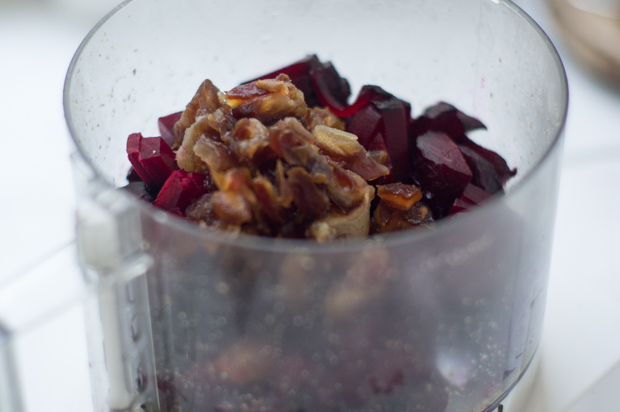
When the beets are cooked and cool enough to peel, remove the skins and chop into cubes. Place in a food processor with the dates, cognac, and garlic. Puree until the texture is to your liking – I left a bit of texture here, but you can go smoother if you prefer.

Transfer to a serving bowl before adding the lemon juice, walnuts, and salt. Taste, and adjust the seasoning if needed. Serve swirled with the creme fraiche, and finished with chives.

Serves 6.

Prep time: 5 min – Cook time: 60 min

Source: 101cookbooks.com

Posted on Leave a comment

Sheet Pan Fish and Chips

Where I live in Boston, seeing “fish and chips” on a restaurant menu is as common as salt. Every fish shack serves them by default, and you’ll find fancy versions at high-end restaurants, too!

When making fish and chips at home, I say leave the deep-frying to the pros and opt for the oven instead.

Sheet Pan Fish and ChipsUse any firm-fleshed white fish fillets for this sheet-pan version of fish and chips. Check the Monterey Bay Aquarium Seafood Watch list to find species available in your area that are not overfished.

When ready to make your dinner, start with the potatoes since they take longer than the fish. Cut Yukon Gold potatoes into spears, toss with olive oil, and roast until golden and puffy.

Sheet pan fish and ChipsMeanwhile, toast the Panko breadcrumbs until golden, and then use them to coat the fish. Panko are an extra-crunchy Japanese variety of breadcrumbs now widely available in supermarkets. Let the fish cook in the hot oven on a separate rack from the potatoes until the fish is cooked through.

The result is a healthier version of fish and chips than the original, and a surprisingly good one, too!

  • Prep time: 15 minutes
  • Cook time: 40 minutes
  • Yield: 4 to 6 servings

If the fish still has the skin attached on one side, you can ask the fish monger to remove it for you. They will do this free of charge.

Ingredients

  • 6 tablespoons vegetable oil, or more if needed
  • 2 1/2 pounds Yukon Gold or other yellow potatoes (3 large or 6 medium), unpeeled
  • 1 teaspoon salt
  • 1 cup Panko, or other unseasoned dry white breadcrumbs
  • 1/2 teaspoon ground black pepper
  • 2 pounds firm-fleshed white fish fillets, skins removed, such as haddock, halibut, pollock, flounder, whiting, redfish, cod, or other fish in your region
  • 1 tablespoon chopped fresh parsley
  • 1 lemon, cut into wedges, to serve
  • Tartar sauce, to serve
report this ad

MethodHide Photos

1 Heat the oven to 450F. Arrange 2 oven racks in the top and bottom third of the oven. Line 2 baking sheets with foil and coat with olive oil (about 1 tablespoon per baking sheet) or with nonstick cooking spray.

2 Prepare the potatoes: Quarter the potatoes lengthwise, then cut each quarter in half again so you get 8 spears from each potato. In a bowl, toss the potatoes with 2 tablespoons of the oil and 1/2 teaspoon salt. Spread the potatoes on the baking sheet with their wedges pointing up, if possible, so the cut sides are exposed (some may not stand; that’s OK).

Sheet pan fish and Chips

3 Roast the potatoes: Roast the spears on the lower rack in the oven for 40 minutes. Rotate the pan partway through (after 20 minutes of cooking) and use a wide metal spatula to stir the potatoes. At this point, it’s fine if the potatoes fall on their sides; the sides touching the pan will become extra-crispy and golden.

Sheet pan fish and Chips

4 Toast the panko: Once the potatoes are in the oven, start on the panko and the fish. To toast the panko, warm a heavy skillet over medium high heat. Add the panko (no oil needed), and lower the heat to medium. Slowly toast the panko, stirring frequently, for 10 to 15 minutes or until a deep golden brown.

Remove the skillet from heat. Stir the olive oil, 1/2 teaspoon salt, and 1/2 teaspoon black pepper into the panko breadcrumbs until they are well coated. Transfer the crumbs to a shallow bowl.

Sheet Pan Fish and Chips Sheet Pan Fish and Chips

5 Prepare the fish: Cut the fish into large strips (“fingers”) or big 3-inch pieces, however you prefer. Rub all the pieces with the remaining tablespoon of olive oil.

6 Coat the fish with panko: Press the fish into the panko so the pieces are coated all over. Set the fish on the second baking sheet, spaced slightly apart.

Sheet Pan Fish and Chips

7 When the potatoes are 15 to 20 minutes away from being done, bake the fish:  Cook thick (2-inch) fish fillets for 15 to 18 minutes and thinner (1 1/2-inch or thinner) fillets for 10 to 13 minutes, or until the fish is firm and the coating is starting to brown. Err on the side of caution and do not over-bake.

7 Serve the fish and chips: Arrange fish and potato spears on plates, sprinkle with parsley, serve with lemon and tartar sauce.

Source: simplyrecipes.com

Posted on Leave a comment

Old Bay Chicken Wings

What’s a Super Bowl without wings? In this chicken wing recipe we are seasoning the wings with Old Bay, a favorite spice blend for crab which works just as well with chicken.

The wings are tossed with in a sauce make with Old Bay, butter, and lemon juice, then baked, broiled, and served with cocktail sauce.

Yes, serving cocktail sauce with chicken wings is a little weird, but it’s good! Especially with the Old Bay.


Follow me on Pinterest

Old Bay Chicken Wings Recipe

Prep time: 15 minutes

  • Cook time: 30 minutes
  • Yield: Serves 4-6

Ingredients

  • 3 pounds chicken wings, separated tips from drummettes
  • 8 Tbsp (1/2 cup or 1 stick) unsalted butter
  • 1 Tbsp Old Bay seasoning, plus more for dusting
  • 1 Tbsp lemon juice
  • Cocktail sauce for dipping
Method

1 Preheat the oven to 425°F. Allow the wings to come to room temperature (or else the sauce will be more difficult to spread on them). Pat the chicken wings dry.

2 Make Old Bay sauce: Melt the butter in a small pot and whisk in the Old Bay and lemon juice. Let it cool enough to feel lukewarm.

3 Mix the sauce again and toss the chicken wings in half the sauce.

4 Bake: Arrange the wings in one layer on a baking sheet lined with parchment paper, aluminum foil, or Silpat and bake at 425°F for 25 minutes.

5 Broil: Take the wings out of the oven and turn on the broiler. Set a rack about 6 inches under the broiler. Turn the wings over on the baking sheet and put under the broiler for 3-4 minutes, or until they are nicely browned.

6 To serve, toss in the remaining sauce and set on a plate. Dust with more Old Bay and serve with your favorite cocktail sauce.


Posted on Leave a comment

Apple-Cinnamon French Toast Muffins

You’ve got to admit it: they’re cute. These individual bites of not-quite-muffins and not-quite-French-toast are almost too good to be true.

Not only are they scrumptious, but they work on your schedule. Throw them together tonight and bake them tomorrow morning for an easy warm breakfast. They also reheat well, so you can make a batch this weekend and have them for breakfast all week long.

Whatever your breakfast situation, these French toast muffins are up to the challenge.

Apple Cinnamon French Toast MuffinsMy secret weapon for French toast has always been cinnamon. Not some fairy dusting of cinnamon, but a full-on downpour.

Since cinnamon and apple go so well and this recipe lends itself well to add-ins, I also like to put little bits of apple in the mix. A few dabs of melted butter on top and a generous sprinkling of coarse sugar on top also yields a sweet crunch.

Apple Cinnamon French Toast MuffinsSoak the bread in the French toast batter for at least four hours, or overnight. You can make and bake them on the same day if you’re an early riser, or you could let them rest overnight and bake them the next morning.

Either way, once baked, they keep, refrigerated, for two to three days, or they can be frozen for up to a one month. Reheat in the oven or microwave.

Follow me on Pinterest

Apple-Cinnamon French Toast Muffins Recipe

  • Prep time: 15 minutes
  • Cook time: 25 minutes
  • Rest time time: 4 hours
  • Yield: 16 muffins

Any apple will work for this recipe, so pick a favorite!

Ingredients

  • 1 loaf country-style bread (1 pound loaf)
  • 5 large eggs
  • 2 cups whole or 2% milk
  • 2 teaspoons vanilla
  • 4 teaspoons cinnamon
  • 1 to 2 apples, cored and cut into 1/4-inch dice (1 1/2 cups diced)
  • 4 tablespoons unsalted butter, melted
  • 5 tablespoons plus 1 teaspoon turbinado sugar or sugar in the raw, divided
  • Maple syrup, to serve (optional)

Special equipment:

  • 2 12-cup muffin pansMethodHide Photos

1 Slice the bread into cubes: Use a serrated bread knife to cut the bread into small 1/2-inch bread cubes. You can leave the crusts on or remove them, as you prefer. Measure out 9 cups of bread cubes; you may not need the entire loaf.

Apple Cinnamon French Toast Muffins

2 Make the French toast batter: In a large bowl, whisk the eggs, milk, vanilla and cinnamon together until well blended. Add the 9 cups of bread cubes. With a large spoon, stir well to coat the bread with the batter.

3 Cover with plastic wrap and refrigerate for 4 hours, or overnight. Stir from time to time to help the bread absorb the custard.

4 When ready to bake the muffins, heat the oven to 350F.

5 Stir the diced apples into the bread and custard mixture.

Apple Cinnamon French Toast Muffins

6 Line and fill the muffin cups: Line 16 of the muffin cups with a double layer of muffin papers, splitting the batch between two muffin pans. Spray the muffin papers with a little cooking spray. Fill each muffin cup with about 1/2 cup of the filling, mounding slightly to form a peak.

7 Top with sugar just before baking: With a pastry brush, dab the melted butter over the tops of the muffins and sprinkle each with 1 teaspoon of the turbinado sugar.

Apple Cinnamon French Toast Muffins

8 Bake for 25 to 30 minutes, or until golden. Let the muffins cool for 10 minutes in the muffin tin, and serve warm with maple syrup to drizzle over top, if desired. (Refrigerate leftovers for several days, or freeze them for up to one month, and reheat in the oven or microwave.)

Source: simplyrecipes.com

Posted on Leave a comment

Creamy Celery Soup

Time to curl up under a cozy blanket and enjoy a warm bowl of soup. This week’s pick? A classic creamy celery soup.

Like cabbage, celery is an oft neglected vegetable, prized for its place in a mirepoix, but rarely the star of the show. Which is silly when you think about it, given how good celery is in soups. (Can you imagine chicken soup without it?)

Creamy Celery Soup

Celery soup, with a supporting cast of some onion, leeks, and a little cream, is utterly delicious, and the perfect way to warm up on a chilly day.

Recipe and photos updated, first published 2014

Follow me on Pinterest

Creamy Celery Soup Recipe

  • Prep time: 15 minutes
  • Cook time: 45 minutes
  • Yield: Serves 4 to 5

Taste the raw celery you plan to use in this soup. The celery should be fresh and good on its own, not old or bitter. If you have a particularly tough or bitter bunch of celery, please don’t use it in this soup, find another use for it.

Ingredients

  • 3 Tbsp butter, divided into 2 Tbsp and 1 Tbsp
  • 1 cup chopped onion
  • 1 1/2 cups sliced leeks, white and light green parts only
  • 5 cups of chopped celery, and 1 1/2 cups of diced celery  (from one large bunch of celery or two small bunches)
  • 2 cloves garlic, minced
  • 2 bay leaves
  • 4 cups chicken stock
  • 1/2 teaspoon to 1 1/2 teaspoons of salt, to taste
  • 1/4 to 1/3 cup of cream
  • Freshly ground black pepper to taste
  • Fresh chopped chives or parsley for garnish
  • MethodHide Photos

1 Sauté onions, leeks, 5 cups of chopped celery: Melt 2 Tbsp butter in a thick-bottomed 4 to 5 quart pot on medium heat. Add the diced onion, the leeks, and 5 cups of the chopped celery.

creamy-celery-soup-method-1 creamy-celery-soup-method-2

Cook on medium heat for 10 minutes until softened. Add the minced garlic and cook for a minute more.

2 Add stock, bay leaves, salt, then simmer: Add the chicken stock and bay leaves to the pot. Taste for salt and add salt. (If you are using unsalted butter and unsalted stock, you will need to add more salt than you expect, if not, maybe just a little salt will be needed.)

creamy-celery-soup-method-3 creamy-celery-soup-method-4

Increase heat to bring to a boil, reduce heat to low and cover to maintain a simmer. Simmer for 15 minutes.

3 Braise remaining celery to soften: While the soup is simmering, prepare the extra celery that will be added later to the soup. In a separate small sauté pan, melt 1 Tbsp of butter on medium heat. Add 1 1/2 cups diced celery to the butter.

creamy-celery-soup-method-5 creamy-celery-soup-method-6

Ladle 1/2 cup of the simmering stock from the soup pot into the sauté pan. Simmer on low for 5 or 6 minutes to soften the celery. Set aside.

4 Purée soup: Remove the soup pot from heat, let cool slightly. Remove and discard the bay leaves. Working in batches, purée the soup in a blender, filling the blender no more than a third full at a time (keep your hand on the lid so the hot liquid doesn’t explode). Return the puréed soup to the pot.

Source: simplyrecipes.com

Posted on Leave a comment

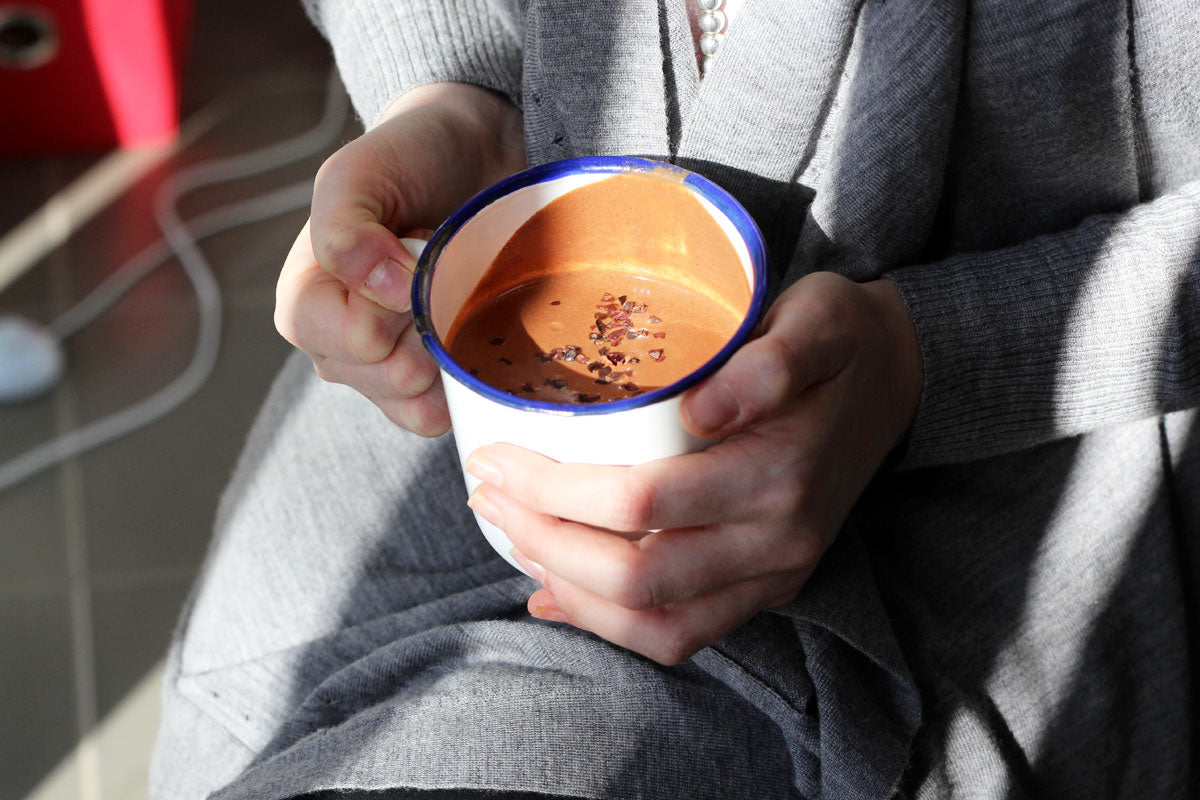
The Maca Hot Chocolate

If a hot water bottle was a drink it’d have to be a hot chocolate don’t you reckon? Comforting, nourishing, cosy, delicious, warming.. I dare say that’s enough adjectives for one sentence, but it’s fitting don’t you think?

So then, take one home made hot chocolate and combine that with the nourishing and energy boosting benefits of maca and you’ve got a winter warming drink that will not only tick all the deliciousness boxes but it’ll work wonders for your health at the same time.

Today’s recipe is fresh from the ‘a sip and a slurp’ section of my morning inspired whole foods recipe eBook A Nourishing Morning (where you’ll find 74 other recipes for drinks, healthy snacks, brunches and breakfasts).

Oh and a word of warning, it’s quite rich (just as I like it), so feel free to add a little hot water to the concoction at the end if you need.

Serves 2
1 ½ cups almond or sesame milk
½ cup coconut milk, canned or fresh
3 tablespoons cacao powder*
1 tablespoon maca powder
1 teaspoon rice malt syrup (or sweetener of choice)
½ teaspoon ground cinnamon
½ teaspoon vanilla powder (or essence)
Pinch sea salt Cacao nibs to garnish

Place all ingredients except for the cacao nibs into a small saucepan over medium heat. Gradually heat the liquid to a gentle simmer for a couple of minutes. Do not allow the liquid to boil.

Remove from heat and pour into two mugs. Garnish generously with cacao nibs.

Maca Hot Chocolate Recipe

Once you’ve overdosed on this hot chocolate (which of course you won’t, because we are all about moderation, aren’t we?), you had better move onto my Golden Turmeric Milk, if not already. It’s a winner grinner.

I’m keen to know from you – what other flavours sit well in a hot chocolate? I was thinking a drop of peppermint essential oil might be rather delicious? Or wild orange? I’d love to hear your thoughts. 

Source: theholisticingredient.com