Posted on Leave a comment

Strawberry, Orange and Vanilla Chia Jam

Last weekend I went to the markets on Sunday afternoon. As many of you would know, visiting the markets at the end of the week has it’s upside – you get loads of produce very, very cheaply! The downside can be the sheer volume of people with the very same idea, which is one reason I don’t tend to go on a Sunday. Anyway. This particular Sunday I bought a LOT of strawberries (a lot of very ripe strawberries) which needed immediate attention. After the recent success of my Raw Raspberry and Vanilla Chia Jam, I decided to create an equally delicious jam, only this time using fresh strawberries. As with the last recipe – jam was never easier to make, mark my words! Oh and a special little shout out to the gorgeous Catie at The Staple Store, who is one of the most loved functional food store owners going around (in Melbourne). She rocks.

You’ll need:
1.5 cups fresh strawberries
3 tablespoons chia seeds
1/2 orange, peeled
1 teaspoon orange peel or zest (I literally just sliced a little of the peel, omit if you prefer less tang)
Seeds of one vanilla pod (or vanilla essence)
Sweetener to taste (I used 4 drops of liquid stevia, the orange is quite sweet so you don’t need much).

Simply throw all your ingredients into your blender and blend until smooth. Cover and pop in the fridge for a minimum of an hour or overnight. The jam should last in your fridge for up to a week. If you prefers yours runnier, add 1/4 cup water to the blender.

Source: theholisticingredient.com

Posted on Leave a comment

Spicy Kimchi

Kimchi is a spicy and tangy fermented food originating from Korea, where it is typically eaten with every meal, thus making it is a day-long family affair. Kimchi works well in fried rice, in spicy kimchi soup, or simply as a side dish. It is a great digestive aid to get the juices flowing before dinner. And, if you have never ventured into the world of fermented foods, Kimchi is a great place to start.

As I mentioned in yesterday’s post, fermented foods are a very important part of our diet and have been used in many cultures to preserve foods, aid digestion and promote the balance of health bacteria within the gut. Read more about the benefits of Fermented Foods here.

It is important to note that fermented foods (e.g. kimchi, sauerkraut) differ from cultured foods in that they ferment by way of bacteria naturally present in the food. Cultured foods (e.g. yoghurt, tempeh, kombucha) add bacteria and require a starter. Both fermented and cultured foods add ‘good’ bacteria to your digestive system, they just do so through differing processes.

With all this talk of bacteria, you’re probably wondering, “…am I going to get ill from this bacteria laden kimchi?” Let me assure you, it is only good bacteria we are talking about, and this recipe is completely safe. Keep it in the fridge once prepared though, ok?!

So, as promised, here is a delicious recipe for kimchi. Adapted from a book by Sandor Ellix Katz “Wild Fermentation”, this recipe was given to me by a delightful Gwinganna Naturopath, Sarah McKenzie, during my recent visit to the extraordinary lifestyle retreat. This is a great project to consider for the weekend as the recipe takes two days to complete.

You’ll need:
Sea Salt (or Celtic/Himalayan)
Half a large drum cabbage
12 radishes
2 carrots
1 onion
1 large chilli
1/2 bulb of garlic
3 tablespoons fresh ginger

Mix a brine of about 1 litre of filtered water and salt to taste (approximately 1 tablespoon). Taste as you go and add the salt gradually so as not to over salt. Stir to dissolve. The brine should be salty, yet palatable.

Coarsely chop the cabbage, slice the radishes and carrot (I like to use purple carrots). Let these vegetables soak in the brine overnight, covered with a plate to submerge. At this stage you may ad other vegetable if you so wish (seaweeds, green beans, beetroot etc).

The following day, prepare the herbs and spices. Grate the ginger, chop the garlic and onion, remove the seeds from the chilli and chop finely (or throw them in whole). Kimchi can absorb a lot of spice so go for it! Don’t worry to much about perfecting quantities.

Drain the vegetables that were soaking, and reserve the brine, If the vegetables taste too salty you can give them a quick rinse with cold water. If not salty enough, add more salt and give a good stir.

Mix the vegetables with the ginger/garlic/chilli/onion paste, then pack into clean glass jars (500ml or 1 litre). Pack tightly and press down on the vegetables until the brine rises. If necessary, add a little of the reserved brine to submerge the vegetables. If you chose to screw on the lid at this stage you may want to open it every few days in order to let out some pressure. Or you may chose to cover the top of the jar with a muslin cloth and affix with a rubber band.

Ferment in your kitchen or other warm place. Taste the kimchi every day. After about a week of fermentation, and when the mix tastes ‘ripe’, affix the lid and store in the fridge. Done! This recipe will keep for a couple of months, but let’s face it, it’s quite unlikely to last that long.

Speaking of gut health, if you’d like to know how to make your own coconut yoghurt at home, you can find the recipe in A Nourishing Morning. I was actually very surprised at how simple it was to make. Affordable too.

Source: theholisticingredient.com

Posted on Leave a comment

Cauliflower Toast

Preparation Time: 5 minutes
Serves: 1

Every once in a while I plate up a new creation that leaves me wondering how on earth I got by for so long without it in my life. Much like the 5 minute 40 second egg you see adorning this dish. That recipe is on repeat every single week, without fail. This recipe creation was a suggestion by my friend Tash, and a mighty fine one at that. To all of you gluten-free peeps out there, let’s be honest – eggs are definitely better on toast. I don’t care what you say..that golden yolk needs toast – it needs something to dribble on!

Given many of us choose not to eat toast often (if at all), I’m hoping this alternative will win your hearts, as it did mine. Just don’t blink, you’ll miss it for sure.

You’ll need:
Half a head cauliflower, minimum
Good drizzle extra virgin olive oil
Spice of choice (I used a sumac spice rub, you could also use cumin or your spice of the moment!)

Heat your oven to 200C and line a tray with baking paper. Cut the cauliflower into 1.5 centimeter slices, utilising the core to hold it all together. Drizzle with olive oil, rubbing it all over, then rub generously with the spice. Place the ‘toast’ on the baking tray, and into the oven for 30 minutes at 200C (or until golden). Serve immediately, with 5 minute 40 second eggs, of course.

Source : theholisticingredient.com

Posted on Leave a comment

The 'Breakfast in Bondi' Smoothie

Makes: 1 generous serving

This quick and easy recipe pays tribute to my awesome years residing in Sydney, in particular that time spent living by the beach at Bondi. How I loved that life. Jumping out of bed in the morning for a Bondi to Bronte jog and a quick dip before pulling on a (pin striped) suit and heels to jump on the 389 bus to Bondi Junction (it was the 389 wasn’t in Bondi peeps?) and heading off to my corporate job. I remember those days so clearly. I had a flat at North Bondi with a best friend. We have such happy memories of sitting on our balcony on a balmy Saturday night with a big bag of cheesy CC’s or Doritos and (cask) Yalumba chardonnay – before hitting the local clubs. Clearly a little has changed in the 15 (or so) years since.

Tropical fruits are so much affordable and resplendent in Sydney – I recall eating mangos like an apple back then.

You’ll need:
1 cup coconut water
1 banana
1 mango cheek
1 heaped tablespoon natural or Greek yoghurt (I use five:am organic yoghurt
1 dessertspoon ground flax seeds
1 dessertspoon chia seeds
1 heaped teaspoon maca powder
Juice 1/2 lime

Throw all ingredients into a blender and blend until smooth. Leave to sit for at least 20 minutes to allow the chia seeds to soften and thicken the smoothie.

For more simple, summery smoothie inspiration, you’ll find some scrumptious ideas in my eBook, A Nourishing Kitchen.

Source: theholisticingredient.com

Posted on Leave a comment

Choc Chilli Protein Balls

Makes: 20 balls

KAPOW! These little ‘pack a punch’ protein balls are our latest healthy treat creation, laden with sustaining goodness to fill that lengthy in between meal gap. With just enough chilli to give your metabolism a boost and plenty of cacao to kick free-radicals to the curb, you’ll be eyeing off the last of these beauties too quick for your likening. Try not to eat them all in one go, if you can possibly refrain.

Make a heap and throw them in the freezer for rainy/hungry days.

You’ll need:
2 cups activated nuts (we used walnuts, brasil & almond)
1/2 cup pure whey protein (or natural protein powder of choice)
1/4 cup chia seeds
1/4 cup water
8 fresh medjool dates, pips removed and cut into pieces
3 heaped tablespoons raw cacao
3 tablespoons coconut oil
2 tablespoon goji berries
1 red chilli, finely chopped
1/2 teaspoon ground cinnamon

Place your nuts into the blender and blend roughly. If you want your protein balls to come with a hot kick, keep the seeds in the chilli. If not, remove the seeds prior to blending. Add all remaining ingredients and blend thoroughly for a good minute or two. The resulting mixture should be moist and tacky. Spoon into bite size balls and use your hands to roll. Roll in raw cacao or dessicated coconut.

Source: theholisticingredient.com

Posted on Leave a comment

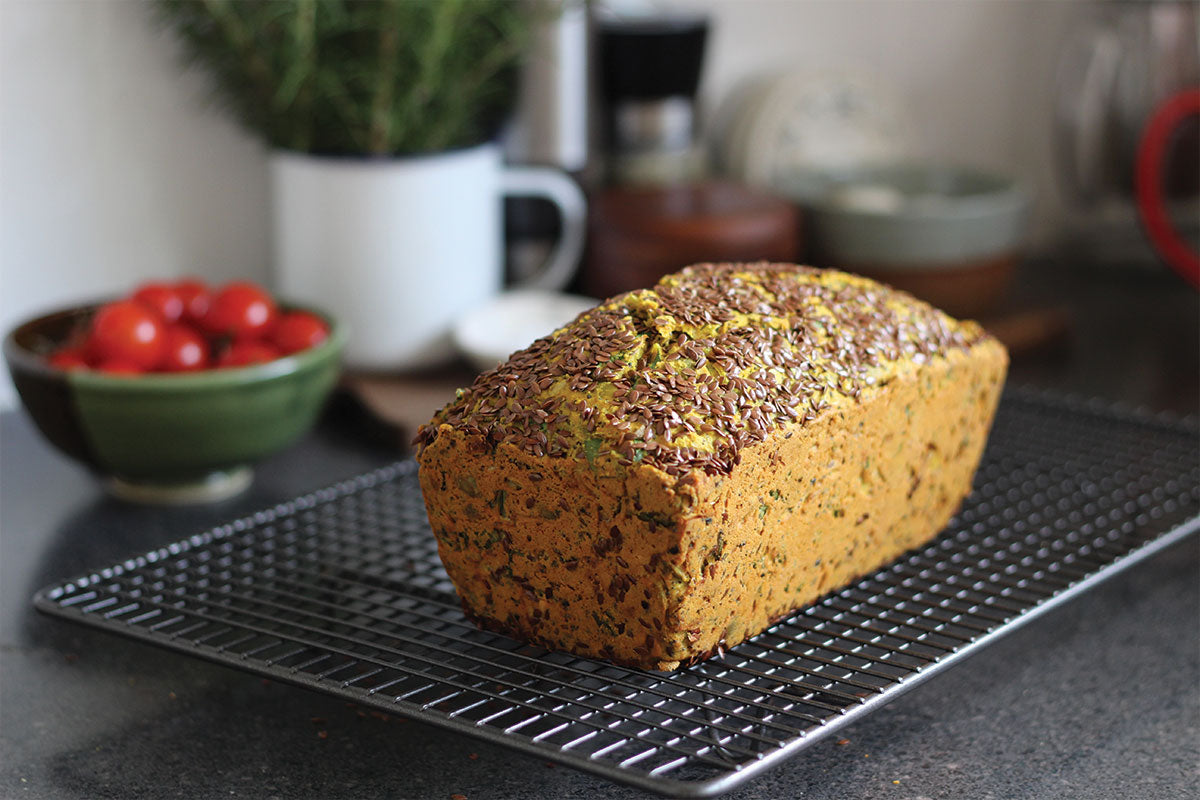
Turmeric, Goats Curd – Onion Seeded Loaf

If I could bake this loaf every day, I would. Laden with so much goddam goodness, it is seriously deeeeeeeLISH! This loaf made its first glorious appearance in my A Nourishing Morning eBook and it’s been a standard in my kitchen ever since. An all-round good guy in the nutritious and delicious stakes, it’s a dead-set winner. Need I go on?

Okay, I will. So where do I start? Well, firstly, there’s the hero of the loaf – turmeric. A powerful anti-inflammatory with a list-as-long-as-my-arm of benefits. Goats curd, high in calcium and great for anyone with a dairy intolerance. Onion, not often given much cred, but a wonderful immune-booster. And finally, those little nutritional powerhouses, seeds, including the little dynamo of plant-based omega-3 fatty acids, flaxseed.

Eat it on its own or top it off with some extra goats curd or my kale pesto and you have yourself a meal. Me thinks, sorry knows, you’ll love it!

Makes 1 loaf

1 2/3 cup white rice flour
1 ½ cup mixed seeds
150g goats curd, coarsely crumbled
4 eggs
2 cloves garlic, peeled, crushed
1 brown onion, peeled, finely chopped
½ cup parsley leaves, roughly chopped
½ cup basil leaves, roughly chopped
½ cup flaxseeds
2 tablespoons coconut oil, melted
1 tablespoon turmeric, ground
½ teaspoon bicarbonate soda
¾ teaspoon sea salt
Black pepper to taste

Turmeric goats curd onion seed loaf

Preheat the oven to 180 degrees C. Grease and line a loaf tin.

In a large bowl place the white rice flour, turmeric, bicarbonate soda, salt, pepper and mixed seeds. Add the onion, garlic, goats curd and herbs, mixing gently to incorporate.

In a small bowl whisk the eggs until foamy then incorporate the coconut oil. Pour the egg mix over the dry mix and combine.

Scatter half the flaxseeds over the base of the loaf tin. Add the batter to the tin. Scatter the remaining flaxseeds on top. Cover the loaf with foil, place in oven and cook for 25 minutes. Remove foil and cook for another 15 minutes until golden and a skewer inserted into the centre comes out clean.

Turmeric goats curd onion seed loaf

For more turmeric love, try my golden turmeric milk – a great accompaniment to this recipe – or maybe these moorish Roasted Turmeric and Chilli Cashews.

Remember to let me know if you love this recipe as much as I do – any and all feedback is always welcome down below. Oh and and any topping combos you try – we love a little inspiration around here.


It’s giveaway time!

This week I am giving away THREE copies of my A Nourishing Morning eBook, full of super healthy, gluten and refined sugar-free delicious recipes, 75 of them in fact (for any time before noon).

All you need to do is share in the comments below one simple thing you do in your morning routine to boost your health or happiness, by COB Friday 2nd December. No more than 50 words (and don’t worry if it’s the same as anyone else’s, the winner will be chosen by random number generator). I’m rather looking forward to reading everyone’s tips!

Conditions of entry: you must be a THI subscriber. If you’re yet to join this tribe you can do so by popping your email address in towards the bottom right of this page. 


Source: theholisticingredient.com

Posted on Leave a comment

Ten minute Almond Meal, Flaxseed and Cinnamon Hot Cakes

You know, I ummed and ahhed about sharing this recipe; I’ve done similar versions before and questioned whether I was bringing enough variety to your weekly menu. I also questioned its simplicity. Then I reconsidered, because it’s exactly what I am trying to do on this website – show you how easy it is to make real, simple, uncomplicated food; food that doesn’t require bells and whistles and knife skills training; food that still looks like real food when you eat it.

In any case, SIMPLE is where it needs to be in my kitchen or it just doesn’t get made.

It’s a very good thing I decided to take a couple of photos of my breakfast the day these babies came into the world isn’t it, because here we are.

Almond meal flaxseed hotcakes

Serves 2, makes 6-8 hot cakes.

1/2 cup almond meal
2 tablespoons ground flaxseed
2 eggs
1/4 – 1/2 cup milk of choice (I used coconut)
1 tablespoon maple or rice malt syrup (or sweetener of choice, to taste), optional
1 teaspoon ground cinnamon
Pinch sea salt
Coconut oil, for frying

Pop a frying pan on medium heat on the stove.

Whisk or beat your eggs until fluffy, then combine all other ingredients (start with 1/4 milk and add as necessary) and continue to whisk until well combined. Taste and add more sweetener if required. The mixture needs to be like pancake batter, just pourable.

Add a heaped teaspoon coconut oil to your hot pan. Pour or spoon pikelet sized hotcakes onto your pan and cook for approximately 3 minutes, until bubbles start appearing. Using an egg slice, gently flip them over and cook for a further 2-3 minutes or until golden either side.

They would be beautiful layered with banana and/or fresh berries. Here I’ve layered them with coconut yoghurt and paw paw. It’s worth mentioning that they are best devoured quickly because as you can see, mine are about to swim away..

ten minute hot cakes

Very soon I am going to share my other go-to vegan hot cake recipe, for those of who who prefer an egg free option.

I’m keen to know from you though, what’s your simple go to breakfast option (that isn’t out of a packet)?  Let’s create some inspiration for all. Personally I love my smoked salmon and avocado on toast. Takes no time at all and sustains me until lunch. 

Source: theholisticingredient.com
Posted on Leave a comment

Ten of the Best Purple Food Recipes.

Nature got it right with purple food – delicious and wonderfully good for you. Full of antioxidants with amazing anti-inflammatory and other health benefits, there really isn’t anything not to like about them.

Purple foods have nutrients that just aren’t found in many other fruits and veggies, so next time you’re sitting down to ‘eat the rainbow’ you might want to add some for those wonderful health benefits we discussed last week. For now though, we’ve made it a little easier for you! Some of the cleverest wellness experts in the land have given us their favorite purple-inspired recipes for you to try. Time to pump up the purple!

Enjoy!

Berry Delicious ‘Ice-Cream’ with Macadamia Crunch

Berries have the ability to make every dish look super special with very little effort. I mean, look at this Berry ‘Ice-cream’! Five minutes to make and probably less time to devour. You’ll find the recipe (by Yours Truly) here.

Berry delicious icecream

Easy Grilled Pork Cutlets & Hazelnut Red Cabbage Slaw

This super simple slaw recipe is from the very lovely Irena of Eat Drink Paleo. It’s one of her go-to dinners and it might well become one of yours too.

Easy grilled paleo pork and slaw

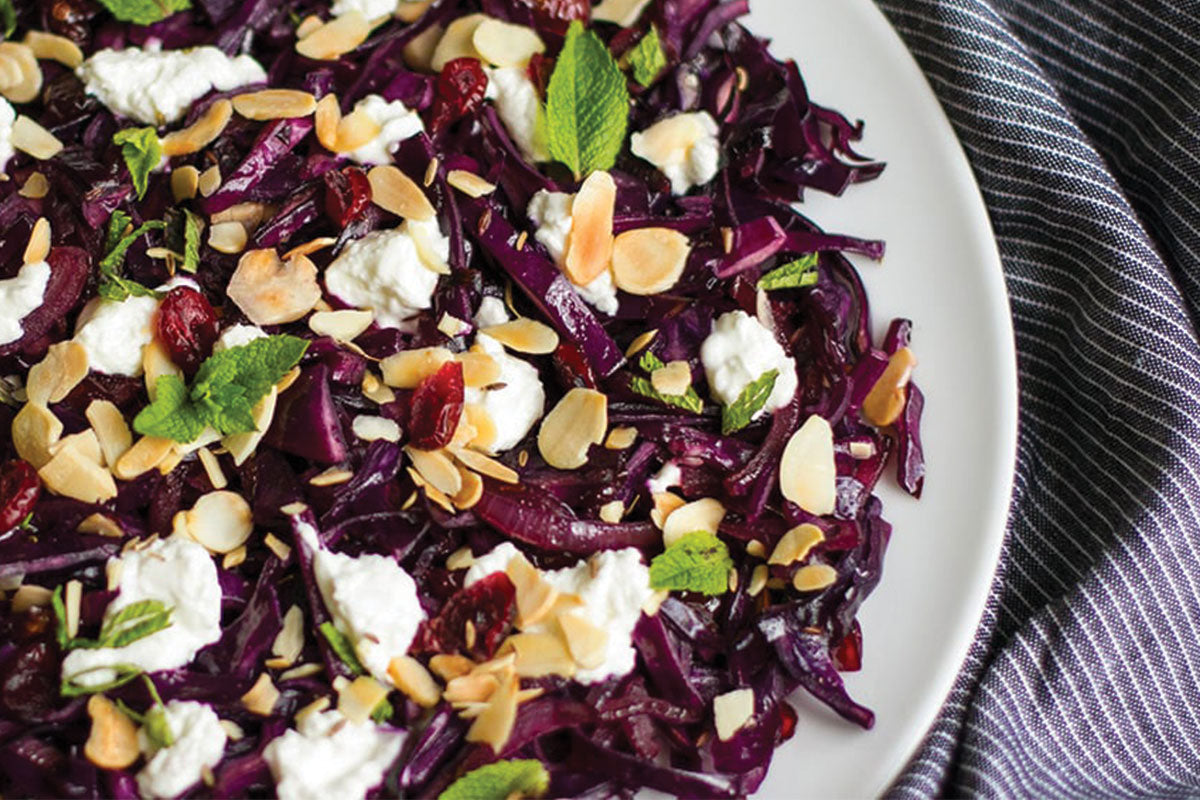
Quick Red Cabbage with Cranberries, Almonds & Goat’s Cheese

Did someone say quick? Anything that is easy to make and super nutritious always grabs my attention. You won’t go wrong with this amazing recipe from Happy Body Formula.

Quick red cabbage salad

Anticancer Eastern Dragon Salad (picture top of page)

Dragons have superpowers and so does this Eastern Dragon Salad courtesy of the very clever Lauren of Ascension Kitchen.

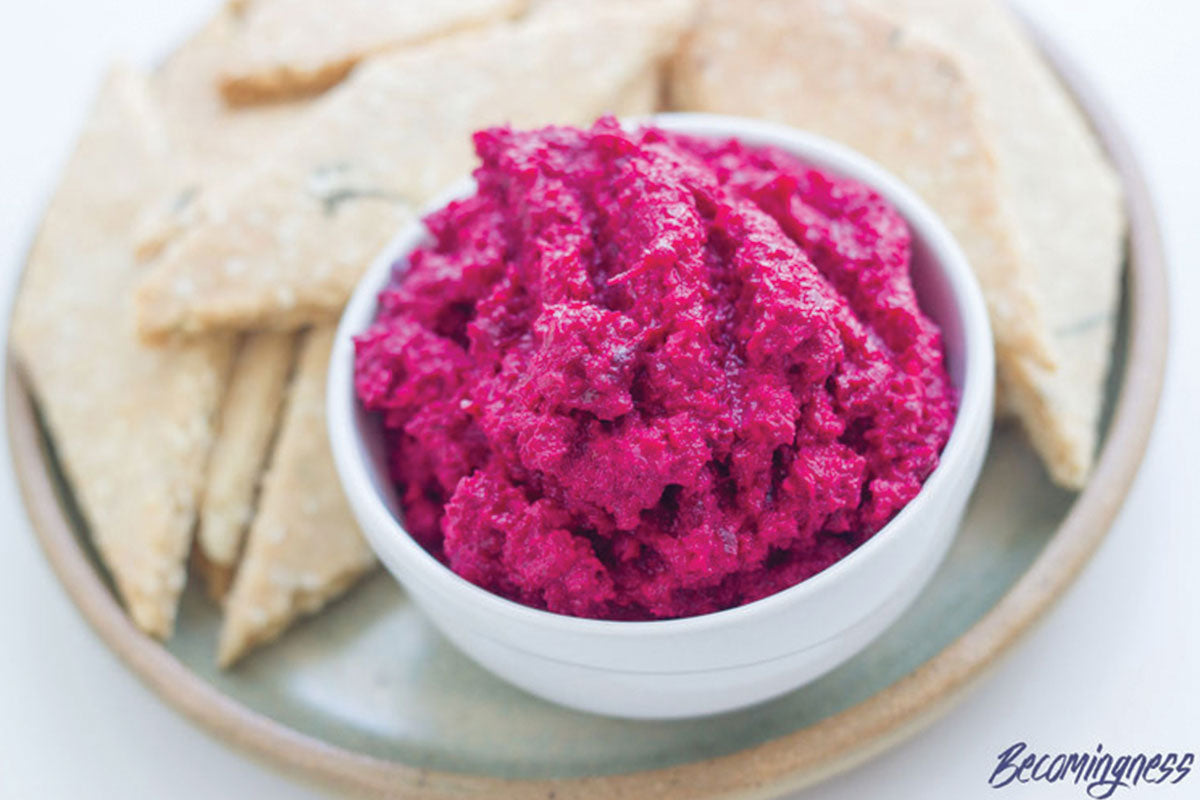
Roast Beetroot, Onion and Macadamia Dip

Look at that colour! Thank you Becomingness for this gorgeous recipe.

Roast beetroot onion macadamia dip

Rustic Baba Ganoush

This recipe uses every last bit of eggplant (doesn’t get more wholefood than that!). Thank you Rachael Allanah for your delish Baba Ganoush recipe.

Rustic baba ganoush

Blueberry Smoothie

Three simple ingredients makes one powerful smoothie. Thanks to my special friend Zara D’Cotta from Oh My Goodness for this luscious recipe.

Oh my goodness blueberry smoothie

Sweet Eggplant & Pumpkin Indian Curry

Warm, aromatic and wonderfully nutritious is how I would describe this. Thank you The Whole Daily – this recipe is a standard in my kitchen.

Eggplant and pumpkin indian curry

Blueberry Cheesecake Bliss Balls

I’m fairly certain that if you put a plate of these in front of me, they won’t last long. Thank you Thermo Foodie and the Chef for these snowy delicacies.

Blueberry cheesecake balls

Blueberry Pancakes with Tahini Drizzle

Another Oh My Goodness delight. Love the combination of blueberries and tahini! You’ll find this recipe here.

Blueberry pancakes with tahini drizzle

Well, I’ve a feeling that will keep you busy for a little while won’t it! So tell me, what’s your favourite way to up the purple foods in your diet? I dare say we’ve a few berry fans in our midst! 


Source: theholisticingredient.com
Posted on Leave a comment

Gluten Free Summer Pudding

Back in “the day” I’d be all over a traditional Summer Pudding. Sugary-berry-puree-soaked-white-bread lining the bowl, cooked sugary berries filling its cavity. Of course the Summer Pudding was at it’s finest when dolloped with vanilla infused whipped cream. Yum scrum.

All however, is not lost. I decided to set my hand to ‘healthyfying’ this very pudding by removing the gluten and refined white sugar and by leaving the berries raw. The result? A far lighter, healthier and less indulgent version of the traditional pudding.

Gluten Free Summer Pudding

* Pudding best made the day before consumption. See other recipe notes below to ensure summer pudding success. 

Serves 6 min.

700 grams fresh berries (raspberries, strawberries, blueberries etc)
1 loaf gluten free bread (or approximately 12 slices)
4 heaped tablespoons coconut sugar (or sweetener of choice)
Whipped coconut cream or Greek yoghurt to serve

Extra fresh berries for serving.

Find yourself a pudding mold or mixing bowl of similar shape to my pudding. In the absence of a pudding bowl I used a 1.5 litre mixing bowl.

Into a bowl, measure out 250 grams of berries (cut strawberries in half if large) and mix through 2 heaped tablespoons of coconut sugar. Set aside.

Into a food processor, place the remaining 450 grams of berries and 2 heaped tablespoons of coconut sugar. Puree until smooth. Strain the puree through a sieve to remove all the seeds. Test for sweetness, add more sweetener if your taste buds tell you too. Pour the mixture into a shallow bowl.

Remove the crust from enough slices of bread to line your bowl. Next, dip the slices into the puree and spread around the entire bowl, making sure there are no gaps. Cut out shapes as necessary to fill remaining gaps. Return remaining puree to the fridge for later.

Fill the mold with the berries, pressing down firmly and line the top with more puree dipped bread.  Then, pop a saucer on top of the lot and weigh down with a heavy can (or two if they fit). Pop this into the fridge overnight (or 4 hours minimum, though I do feel overnight will produce better results).

Remove from the fridge and with the saucer in place gently turn upside down to allow the pudding to fall out. If there are any white spots on the bread use extra puree to colour. Scatter fresh berries over the pudding. Serve with extra puree and whipped coconut yoghurt or vanilla infused Greek yoghurt.


Recipe notes:

1. Opt for fresh gluten free bread (not frozen) that doesn’t break in your hands whilst dunking it in the puree (we all know the cardboard-like gluten free bread I’m talking about). I used a great brand called GF Precinct, made here in Victoria. 
2. I had trouble getting the bread out of the bowl, but managed.. Some recipes advocate the use of cling wrap – and as much as I would prefer not to recommend this I do think it’s the answer for those preferring to err on the side of caution. Alternatively try baking paper.
3. I don’t enjoy super sweet desserts – that being said, make the puree to the recipe and add more sweetness to taste if necessary. Feel free to sub coconut sugar with rice malt syrup or raw honey. 

Looking for some more festive season inspiration for your Christmas menus? Check out our Top Ten healthy (and sweet) Christmas Recipes or our Top Ten Healthy (and Savoury) Christmas Recipes.

Gluten Free Summer Pudding

Feel free to share this recipe with the gluten free’ers in your life, or better still,pin it to your healthy pinterest board so it’s at your fingertips when you’re ready to get creative.


Source: theholisticingredient.com

Posted on Leave a comment

Wasabi and Tamari Roasted Brussels Sprouts

One of the best things about eating only seasonal produce is the way it feels when their times comes around again – you get such a lovely suprise when they greet you in store, in the season for which they belong. Mangoes and raspberries in summer, figs towards the end of summer, mushrooms in autumn, and on it goes. It’s difficult to tire of such foods when you know you’ve got limited time together; it keeps things interesting and inspiring in the kitchen.

One of the most wonderful feelings for me each winter is the arrival of brussels sprouts and if I could be honest, by the time their season closes we are probably ready to part. The brussels sprout and I hang together a LOT.

Most of us, we’ve had our battles with these little bundles of goodness haven’t we. As a kid I sat up at the kitchen table until each cold and soggy sprout was forced down my reluctant throat. If my memory serves me correctly I’m pretty certain it was the way in which they were prepared that created such instant repulsion in my mouth.

I’ve decided that it’s my job today to INSIST that the brussels sprouts haters amongst you TRY THIS RECIPE. You hear me? Try this recipe and if you still can’t stand them you are hereby relieved from any further brussels sprouts consumption.

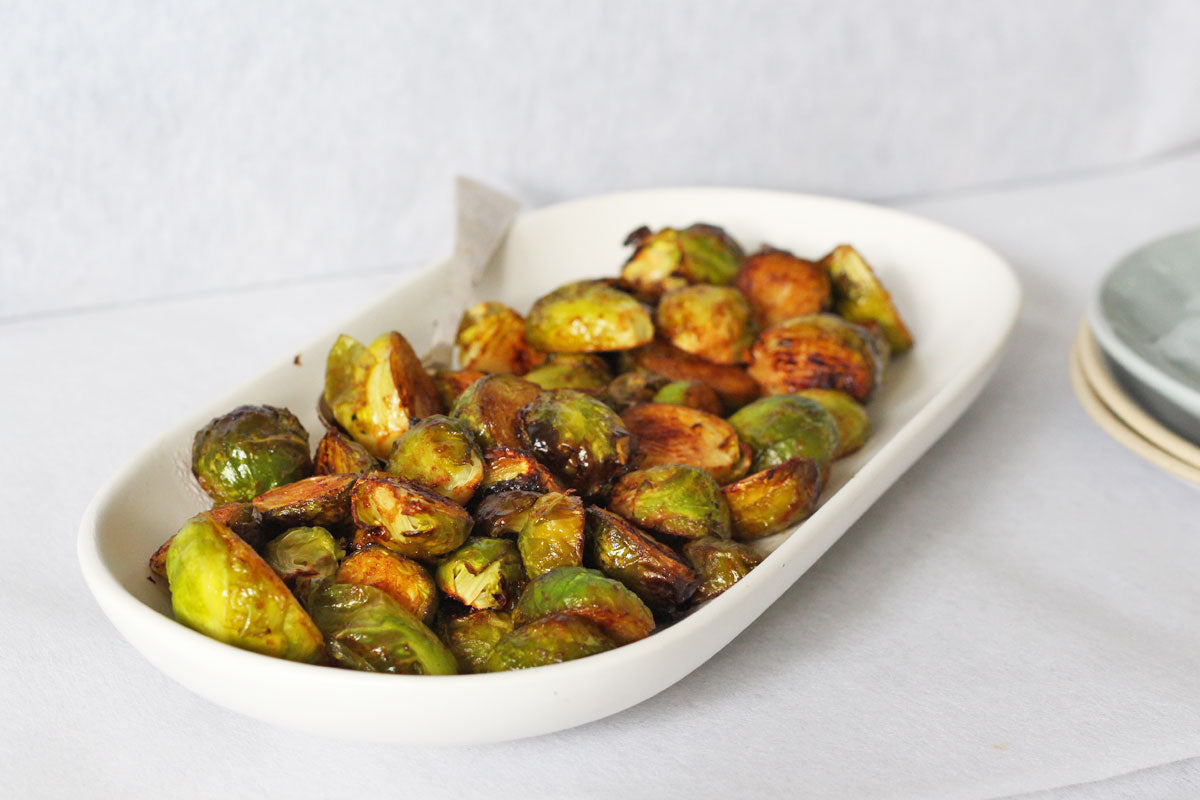
I’ll be honest though, I’ll be suprised to hear if their beautiful flavoursome, caramely burnty bits don’t win over your heart.. I’m that confident.

Wasabi and tamari roasted brussels sprouts

Serves 4 as a side.

500 grams brussels sprouts
1 tablespoon coconut oil, melted
1 heaped teaspoon wasabi paste
2 teaspoons tamari

Preheat your oven to 200 degrees celsius and line a baking tray with baking paper.

Rinse and dry your sprouts and trim their ends, removing any spoiled leaves from the sprout at the same time. Slice in half length ways.

In a large mixing bowl combine the coconut oil, wasabi and tamari. Adding your brussels sprouts to the bowl, toss until the sprouts are very well coated.

Spread out evenly onto your tray, cut side down and place in the oven for approximately 20 minutes, or until their edges turn a rich golden brown. Don’t be worried if you get black bits like I have – burnt edges on a brussels sprout are nothing to be scoffed at! You may though like to turn your oven tray around during cooking if your oven temperature is uneven.

Remove and serve immediately. These are also gorgeous over the next couple of days in a salad.

Roasted Brussels Sprouts with Wasabi and Tamari

So tell me, what is your favourite way to eat brussels sprouts? And if you’re not a lover, PLEASE let me know if I actually do manage to convert you with this recipe!

Source: theholisticingredient.com